
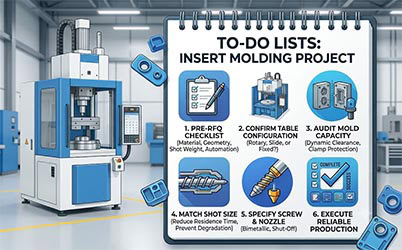
Select an insert molding machine by checking mold compatibility, material processing, insert handling and demonstrated part requirements together. Tonnage alone is insufficient for either vertical or horizontal equipment, but no single layout or option is correct for every insert project.
Check the Mold through the Complete Movement
Provide the mounted mold dimensions, weight, fixture and insert envelope, opening, ejection and connection requirements. Review static fit and clearance during slide or rotary travel, including cable routing and automation. Confirm the proposed model drawing and actual movement sequence.
Assess clamp requirements using the appropriate pressure, total projected-area and tooling basis. Do not prescribe a universal safety factor or copy a formula without clarifying units and force conventions. Low-pressure mold protection does not replace personnel safeguarding.
Compare Standard, Slide and Rotary Arrangements
Map insert preparation, loading, location checks, movement, molding, unloading and inspection. Identify which tasks can overlap in the actual tool. A double slide does not remove loading time entirely, and a rotary table is not automatically the highest-output solution.
Use a representative cycle breakdown and accepted-part results. Do not assume a 30%–50% reduction or 24/7 operation from the table label.
Match Shot and Residence Requirements
Identify resin grade, part and runner quantity, cavities, cycle, preparation and expected waiting or restart conditions. Confirm usable shot, plasticizing demand and the proposed injection unit.
Residence assessment needs the relevant material inventory, throughput, temperatures and operating history. A machine’s maximum rated shot capacity is not necessarily the actual material inventory in the barrel. A simple capacity-to-shot ratio is not a validated residence-time distribution or a safe operating limit.
Do not apply fixed five-to-eight-minute limits to every PA66, PBT or PPS grade. Use the exact supplier processing information and the machine configuration. A smaller screw or alternative injection unit is an option to review, not an automatic cure.
Specify Screw, Barrel and Nozzle by Application
Review filler, reinforcement, abrasion or corrosion concerns, thermal sensitivity, shot and injection demand. Confirm the selected compatible screw, barrel and nozzle arrangement. Glass reinforcement does not establish a universal wear lifetime, and a shut-off nozzle is not mandatory for every nylon or a guarantee that drooling disappears.
Define Handling and Interfaces
Specify insert location and retention, presence checks, robot or feeder interactions, inspection, protective arrangement and integration responsibilities. Confirm the exact communication or electrical interface and its functions with the equipment suppliers. A generic interface label or a speculative future plan does not establish compatibility.
Agree the Acceptance Evidence
- Actual material grades, inserts, mold and quoted configuration.
- Dimensions, insert position and required interface or functional tests.
- Representative production, waiting and restart conditions where relevant.
- Complete cycle, accepted output and recorded deviations.
- Installation, documents, training and support scope.
Selection Questions
Does Gravity Alone Secure an Insert?
No. Verify the locating and retention design through closure and filling.
Can a Generic Residence Formula Prove That a Grade Will Not Degrade?
No. Confirm the material-specific requirements and actual processing history.
See insert process basics, plasticizing-unit selection and delivery and acceptance planning.

